Android的插件化开发经过这么多年的发展,已经比较成熟,也诞生了很多优秀的插件框架,比如VirtualApk、RePlugin、Shadow等。其实所有支持四大组件的插件框架,都在解决一个问题,就是绕过Manifest注册表校验。传统的做法就是通过Hook技术,欺骗Android系统,注册表插桩,让系统认为启动的是插桩的四大组件,实际loadclass插件的类。
Shadow介绍
Shadow可以说算是另辟蹊径,开源之初,对外宣传的是零Hook,可关键其实源码里是有一处Hook点的,对此官方也解释了,并非必须。那么Shadow是如何“骗”系统的呢?这其实也就是Shadow设计的巧妙之处,后文会进行分析。
关于Shadow在分析前,有几个点我觉得有必要搞清楚:
1、Shadow是跨进程的,插件运行在插件进程,通过Binder机制通信,所以不了解Binder的,建议提前熟悉一下,否则看着会比较绕。
2、Shadow的宿主和业务插件之间还有一层中间层,中间层也是以插件的形式加载,同时可以升级,有较强的灵活性。
3、插件里写一个页面,比如继承自Activity,我们可以正常写,但是在编译期会修改继承关系,将其父类改为ShadowActivity,ShadowActivity实际上不是一个Activity,他持有HostActivity的代理对象,依赖此完成生命周期的回调。
这个操作是靠修改字节码实现的,自定义gradle脚本,通过javassist或者asm都可以实现,不再赘述。
4、我纯属因为感兴趣所有阅读了源码,实际上并没有应用在生产环境,毕竟推进公司框架层面的修改不是那么容易,而且也不一定合适。各位在选择的时候,也要考虑全面,适合自己公司业务的解决方案才是最好的。
思考:
虽然Shadow与传统插件框架的实现方式不同,但有一些基本流程还是一致的。比如插件的下载、安装、更新、卸载。解析插件apk,插件四大组件的信息解析及缓存,插件的ClassLoader、Resource的处理等。
Shadow不一样的点前言已经介绍,所以可以想到,第一次加载业务插件,首先会加载中间层插件。要想代理Activity(ProxyActivity)和插件Activity(PluginActivity)关联,同时ProxyActivity的生命周期方法能调用到PluginActivity,那么ProxyActivity必然会持有PluginActivity实例话对象的引用。PluginActivity里有具体的业务实现,同时需要回调ProxyActivity的生命周期方法,那么PluginActivity也会有一个有此能力的代理对象。
再次强调,PluginActivity并不是一个真实的Activity,不要被Demo里的源码所欺骗,之所以要在编译期修改继承关系,好处就是在开发阶段,我们可以按照一个真实的Activity的写法去开发,剩下的事儿由框架处理;另外插件也是可以独立运行的。
可能放两张图可以表达的更清楚:
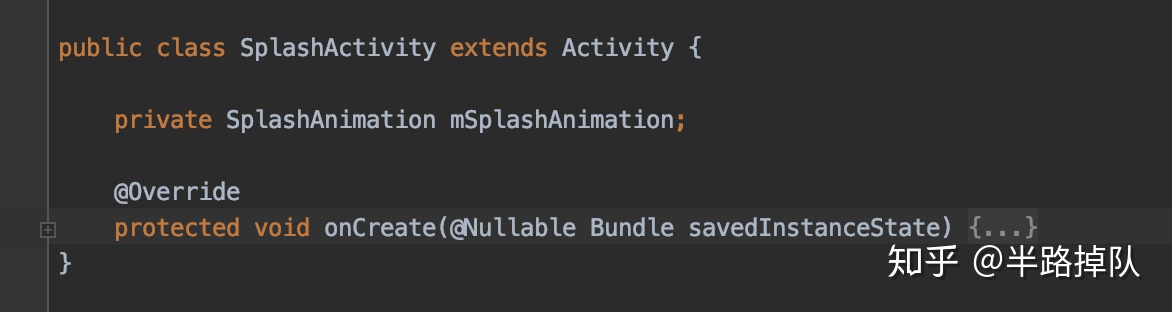
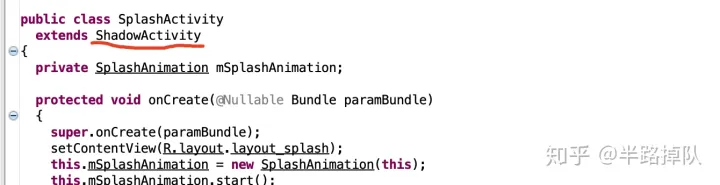
下面是我反编译插件apk得到的代码
源码分析
Shadow源码较多,我们只分析一下插件Activity是如何启动及运行的。
可以先看一下打包出来的apk的结构

我的理解pluginmanager.apk loader.apk runtime.apk是中间层
config.json 是发版信息,主要用于检查更新,其中的uuid即为当前版本的唯一标示
HostApplication的onCreate方法会有一些初始化的工作,主要是把asset目录下的插件复制到指定目录,还有runtime插件的状态恢复,非核心流程,不再详述。
我们直接看启动插件的逻辑,很容易就找到加载插件的缺省页PluginLoadActivity,只有一个startPlugin方法:
1
2
3
4
5
6
7
8
9
10
11
12
13
14
15
16
17
18
19
20
21
22
23
24
25
26
27
28
29
30
31
32
33
34
35
36
37
38
| public void startPlugin() {
PluginHelper.getInstance().singlePool.execute(new Runnable() {
@Override
public void run() {
HostApplication.getApp().loadPluginManager(PluginHelper.getInstance().pluginManagerFile);
Bundle bundle = new Bundle();
bundle.putString(Constant.KEY_PLUGIN_ZIP_PATH, PluginHelper.getInstance().pluginZipFile.getAbsolutePath());
bundle.putString(Constant.KEY_PLUGIN_PART_KEY, getIntent().getStringExtra(Constant.KEY_PLUGIN_PART_KEY));
bundle.putString(Constant.KEY_ACTIVITY_CLASSNAME, getIntent().getStringExtra(Constant.KEY_ACTIVITY_CLASSNAME));
HostApplication.getApp().getPluginManager()
.enter(PluginLoadActivity.this, Constant.FROM_ID_START_ACTIVITY, bundle, new EnterCallback() {
@Override
public void onShowLoadingView(final View view) {
mHandler.post(new Runnable() {
@Override
public void run() {
mViewGroup.addView(view);
}
});
}
@Override
public void onCloseLoadingView() {
finish();
}
@Override
public void onEnterComplete() {
}
});
}
});
}
|
懒的长篇大论,相关逻辑已经写在注释里,会执行到DynamicPluginManager的enter方法:
1
2
3
4
5
6
7
8
9
10
| public void enter(Context context, long fromId, Bundle bundle, EnterCallback callback) {
if (mLogger.isInfoEnabled()) {
mLogger.info("enter fromId:" + fromId + " callback:" + callback);
}
updateManagerImpl(context);
mManagerImpl.enter(context, fromId, bundle, callback);
mUpdater.update();
}
|
mManagerImpl是一个接口,上面的代码其真实实例是SamplePluginManager,updateManagerImpl方法会安装pluginmanager.apk插件,同时通过反射创建一个SamplePluginManager实例,也就是上面的mManagerImpl,同时支持pluginmanager.apk插件的更新逻辑。
所以进入SamplePluginManager的enter->onStartActivity,代码逻辑比较简单,没什么可说的,需要注意一点是会启动一个线程,去加载zip包下的几个插件(runtime、loader、业务插件),而后会调用到其父类FastPluginManager的startPluginActivity方法:
1
2
3
4
5
6
7
8
9
| public void startPluginActivity(Context context, InstalledPlugin installedPlugin, String partKey, Intent pluginIntent) throws RemoteException, TimeoutException, FailedException {
Intent intent = convertActivityIntent(installedPlugin, partKey, pluginIntent);
if (!(context instanceof Activity)) {
intent.setFlags(Intent.FLAG_ACTIVITY_NEW_TASK);
}
context.startActivity(intent);
}
|
核心流程就在convertActivityIntent里,从命名就可以看出来,最终会把我们要启动的插件Activity,映射成一个在Manifest里注册的真实Activity,也就是注释中标注的PluginDefaultProxyActivity。
可以回看一下上文“思考”中的内容,即为Shadow第一次使用插件的主要流程,convertActivityIntent的代码如下:
1
2
3
4
5
6
7
8
9
10
11
12
| public Intent convertActivityIntent(InstalledPlugin installedPlugin, String partKey, Intent pluginIntent) throws RemoteException, TimeoutException, FailedException {
loadPlugin(installedPlugin.UUID, partKey);
Map map = mPluginLoader.getLoadedPlugin();
Boolean isCall = (Boolean) map.get(partKey);
if (isCall == null || !isCall) {
mPluginLoader.callApplicationOnCreate(partKey);
}
return mPluginLoader.convertActivityIntent(pluginIntent);
}
|
loadPlugin:先安装中间层插件再安装业务插件,当然如果已安装,直接跳过
mPluginLoader:是一个比较关键的变量,具体他是什么初始化的,下面会具体分析
后续的代码执行逻辑可自行看源码,首先会执行loadPluginLoaderAndRuntime方法,这个方法里会初始化插件进程的服务,同时将插件进程的binder对象赋值给mPpsController:
1
2
3
4
5
6
7
8
9
10
11
12
13
14
15
16
17
18
19
20
21
22
23
24
25
26
27
28
29
30
31
32
33
34
35
36
37
38
39
40
41
42
43
44
45
46
47
48
49
50
51
52
53
54
55
56
57
58
59
60
61
62
63
64
65
66
67
68
69
70
71
72
73
74
75
76
77
78
79
80
81
82
83
84
85
86
87
88
89
90
91
92
93
94
95
96
97
98
99
100
101
102
103
104
105
106
107
108
109
110
111
| private void loadPluginLoaderAndRuntime(String uuid, String partKey) throws RemoteException, TimeoutException, FailedException {
if (mPpsController == null) {
bindPluginProcessService(getPluginProcessServiceName(partKey));
waitServiceConnected(10, TimeUnit.SECONDS);
}
loadRunTime(uuid);
loadPluginLoader(uuid);
}
......
public final void bindPluginProcessService(final String serviceName) {
if (mServiceConnecting.get()) {
if (mLogger.isInfoEnabled()) {
mLogger.info("pps service connecting");
}
return;
}
if (mLogger.isInfoEnabled()) {
mLogger.info("bindPluginProcessService " + serviceName);
}
mConnectCountDownLatch.set(new CountDownLatch(1));
mServiceConnecting.set(true);
final CountDownLatch startBindingLatch = new CountDownLatch(1);
final boolean[] asyncResult = new boolean[1];
mUiHandler.post(new Runnable() {
@Override
public void run() {
Intent intent = new Intent();
intent.setComponent(new ComponentName(mHostContext, serviceName));
boolean binding = mHostContext.bindService(intent, new ServiceConnection() {
@Override
public void onServiceConnected(ComponentName name, IBinder service) {
if (mLogger.isInfoEnabled()) {
mLogger.info("onServiceConnected connectCountDownLatch:" + mConnectCountDownLatch);
}
mServiceConnecting.set(false);
mPpsController = PluginProcessService.wrapBinder(service);
try {
mPpsController.setUuidManager(new UuidManagerBinder(PluginManagerThatUseDynamicLoader.this));
} catch (DeadObjectException e) {
if (mLogger.isErrorEnabled()) {
mLogger.error("onServiceConnected RemoteException:" + e);
}
} catch (RemoteException e) {
if (e.getClass().getSimpleName().equals("TransactionTooLargeException")) {
if (mLogger.isErrorEnabled()) {
mLogger.error("onServiceConnected TransactionTooLargeException:" + e);
}
} else {
throw new RuntimeException(e);
}
}
try {
IBinder iBinder = mPpsController.getPluginLoader();
if (iBinder != null) {
mPluginLoader = new BinderPluginLoader(iBinder);
}
} catch (RemoteException ignored) {
if (mLogger.isErrorEnabled()) {
mLogger.error("onServiceConnected mPpsController getPluginLoader:", ignored);
}
}
mConnectCountDownLatch.get().countDown();
if (mLogger.isInfoEnabled()) {
mLogger.info("onServiceConnected countDown:" + mConnectCountDownLatch);
}
}
@Override
public void onServiceDisconnected(ComponentName name) {
if (mLogger.isInfoEnabled()) {
mLogger.info("onServiceDisconnected");
}
mServiceConnecting.set(false);
mPpsController = null;
mPluginLoader = null;
}
}, BIND_AUTO_CREATE);
asyncResult[0] = binding;
startBindingLatch.countDown();
}
});
try {
startBindingLatch.await(10, TimeUnit.SECONDS);
if (!asyncResult[0]) {
throw new IllegalArgumentException("无法绑定PPS:" + serviceName);
}
} catch (InterruptedException e) {
throw new RuntimeException(e);
}
}
|
上文说过,整个流程是运行在子线程,所以启动服务要post到UI线程
后续执行的loadRunTime(uuid);loadPluginLoader(uuid);方法即为启动中间层插件的逻辑,大同小异,只分析loadPluginLoader的执行逻辑,因为要解释关键变量mPluginLoader是怎么来的。
1
2
3
4
5
6
7
8
9
10
11
12
13
14
15
| public final void loadPluginLoader(String uuid) throws RemoteException, FailedException {
if (mLogger.isInfoEnabled()) {
mLogger.info("loadPluginLoader mPluginLoader:" + mPluginLoader);
}
if (mPluginLoader == null) {
PpsStatus ppsStatus = mPpsController.getPpsStatus();
if (!ppsStatus.loaderLoaded) {
mPpsController.loadPluginLoader(uuid);
}
IBinder iBinder = mPpsController.getPluginLoader();
mPluginLoader = new BinderPluginLoader(iBinder);
}
}
|
PpsStatus:只是一个状态bean,唯一作用就是保存插件的安装状态
mPpsController:怎么来的上文已经说过,所以他所调用的方法的具体实现,都是插件进程Service里,即PluginProcessService
mPpsController.loadPluginLoader方法,即为安装loader插件,具体不再分析,可以自行查看Shadow源码
PluginProcessService的loadPluginLoader方法调用,有个关键点要注意:
1
2
3
4
5
6
7
8
9
10
11
12
13
14
15
| void loadPluginLoader(String uuid) throws FailedException {
...
try {
...
PluginLoaderImpl pluginLoader = new LoaderImplLoader().load(installedApk, uuid, getApplicationContext());
pluginLoader.setUuidManager(mUuidManager);
mPluginLoader = pluginLoader;
} catch (RuntimeException e) {
...
} catch (Exception e) {
...
}
}
|
上文中提到,第一次启动插件服务的时候mPluginLoader是null,他的初始化就是在这里,反射创建了一个PluginLoaderBinder对象,也就是mPluginLoader。但是真正干活的是其持有的DynamicPluginLoader对象。具体可以看一下com.tencent.shadow.dynamic.loader.impl.LoaderFactoryImpl类
不要忘了这是跨进程的,所以要这样封装,mPluginLoader也是一个binder对象。
再回到FastPluginManager的loadPlugin方法
中间层插件已处理完,那就到了业务插件,会调用mPluginLoader.getLoadedPlugin(),会返回已安装的插件信息,这个方法的具体实现,从上文分析可知,是在DynamicPluginLoader里。如果要加载的插件没有安装,会调用mPluginLoader.loadPlugin(partKey);安装指定插件。
后续的插件安装逻辑直接看源码吧,相信大家都能看懂,会调到ShadowPluginLoader的loadPlugin方法。
再回到convertActivityIntent方法
如果插件是第一次启动,那么会调用mPluginLoader.callApplicationOnCreate(partKey);
mPluginLoader是谁已经说了很多次,不再强调。这个方法会初始化插件的contentprovider以及broadcastreceiver
我们直接看mPluginLoader.convertActivityIntent(pluginIntent),一连串的方法调用连,最终会调用到ComponentManager类的方法:
1
2
3
4
5
6
7
8
9
|
private fun Intent.toActivityContainerIntent(): Intent {
val bundleForPluginLoader = Bundle()
val pluginComponentInfo = pluginComponentInfoMap[component]!!
bundleForPluginLoader.putParcelable(CM_ACTIVITY_INFO_KEY, pluginComponentInfo)
return toContainerIntent(bundleForPluginLoader)
}
|
其实很好理解,这里就是将插件Activity映射到我们注册在宿主的Activity,同时将映射关系以及一些必要的数据传递。
在demo里最终映射的Activity是com.tencent.shadow.sample.plugin.runtime.PluginDefaultProxyActivity
这是一个真实的Activity,可以正常启动。其主要逻辑都在父类PluginContainerActivity中。
先看PluginContainerActivity的初始化方法:
1
2
3
4
5
6
7
8
9
10
11
12
13
14
| HostActivityDelegate hostActivityDelegate;
public PluginContainerActivity() {
HostActivityDelegate delegate;
DelegateProvider delegateProvider = DelegateProviderHolder.getDelegateProvider();
if (delegateProvider != null) {
delegate = delegateProvider.getHostActivityDelegate(this.getClass());
delegate.setDelegator(this);
} else {
Log.e(TAG, "PluginContainerActivity: DelegateProviderHolder没有初始化");
delegate = null;
}
hostActivityDelegate = delegate;
}
|
hostActivityDelegate:看命名就知道,这是宿主Activity的代理类,我猜应该是给插件Activity使用的,你们觉得呢?
我们来看一下hostActivityDelegate到底是什么:
1
2
3
| override fun getHostActivityDelegate(aClass: Class<out HostActivityDelegator>): HostActivityDelegate {
return ShadowActivityDelegate(this)
}
|
回到PluginContainerActivity,以onCreate方法为例:
1
2
3
4
5
6
7
8
9
| @Override
final protected void onCreate(Bundle savedInstanceState) {
...
if (hostActivityDelegate != null) {
hostActivityDelegate.onCreate(savedInstanceState);
} else {
...
}
}
|
这里会调用hostActivityDelegate的onCreate,也就是ShadowActivityDelegate类的onCreate方法:
1
2
3
4
5
6
7
8
9
10
11
12
13
14
15
16
17
18
19
20
21
22
23
24
25
26
27
28
29
30
31
32
|
override fun onCreate(savedInstanceState: Bundle?) {
...
try {
val aClass = mPluginClassLoader.loadClass(pluginActivityClassName)
val pluginActivity = PluginActivity::class.java.cast(aClass.newInstance())
initPluginActivity(pluginActivity)
mPluginActivity = pluginActivity
...
pluginActivity.onCreate(pluginSavedInstanceState)
mPluginActivityCreated = true
} catch (e: Exception) {
throw RuntimeException(e)
}
}
private fun initPluginActivity(pluginActivity: PluginActivity) {
pluginActivity.setHostActivityDelegator(mHostActivityDelegator)
pluginActivity.setPluginResources(mPluginResources)
pluginActivity.setHostContextAsBase(mHostActivityDelegator.hostActivity as Context)
pluginActivity.setPluginClassLoader(mPluginClassLoader)
pluginActivity.setPluginComponentLauncher(mComponentManager)
pluginActivity.setPluginApplication(mPluginApplication)
pluginActivity.setShadowApplication(mPluginApplication)
pluginActivity.applicationInfo = mPluginApplication.applicationInfo
pluginActivity.setBusinessName(mBusinessName)
pluginActivity.setPluginPartKey(mPartKey)
pluginActivity.remoteViewCreatorProvider = mRemoteViewCreatorProvider
}
|
省略掉一些常规代码
val aClass = mPluginClassLoader.loadClass(pluginActivityClassName)
pluginActivityClassName:我们要启动的插件Activity的类路径即为SplashActivity
反射实例化保存在mPluginActivity,用于调用插件Activity的生命周期等系统方法
那么插件Activity要调用super方法,比如onCreate的super方法怎么办呢?
在initPluginActivity方法中会将mHostActivityDelegator 传递给插件activity使用:
pluginActivity.setHostActivityDelegator(mHostActivityDelegator)
本文最开始说过,插件Activity会在编译期修改其继承关系为ShadowActivity,ShadowActivity继承自PluginActivity:
1
2
3
4
5
6
7
| public abstract class PluginActivity extends ShadowContext implements Window.Callback {
HostActivityDelegator mHostActivityDelegator;
public void onCreate(Bundle savedInstanceState) {
mHostActivityDelegator.superOnCreate(savedInstanceState);
}
}
|
宿主调用插件onCrate方法,插件会通过mHostActivityDelegator回调到宿主的super,即mHostActivityDelegator.superOnCreate(savedInstanceState);
1
2
3
| public void superOnCreate(Bundle savedInstanceState) {
super.onCreate(savedInstanceState);
}
|
到这整个流程就跑通了。